Showing posts with label Appetizers and Snacks. Show all posts

Sunday, January 31, 2016

Smoked Sausage-Cheese Biscuits


Besides sweet pies and BBQ, biscuits are my favorite American stuff, I love them so much that I loose any control when I see them, which means I can eat a great number of those. 


My excitement already starts while the biscuits are in the oven, that smell of butter is so promising. When they get out, I like to brush them with melted butter, just a final touch, and then I eat them layer by layer. 


I don't know the number of biscuits that I made, it is definitely a huge one, but I really know the best recipe for them. Over the time, I created very nice versions adding different ingredients, so far my favorites are biscuits with smoked sausage and cheese (the recipe follows), then those with goat cheese and za'atar, and biscuits with cheddar cheese. Also, I like to eat them with homemade herb butter.


For the wet ingredient, I usually use buttermilk, but I have to tell you Kefir is even better, although more expensive. However, if I don't have any of those at home, you can use sour cream with some milk, and that works as well.


Smoked sausage and cheese is a combination that cannot go wrong in biscuits. Surprisingly, I have never saw that combination here in US before, I got idea from my sister-in-low from Serbia who made the similar stuff. I gave it a try and outcome surpassed my expectations.


In my opinion these biscuits are great for breakfast, as an appetizer, and they also make a great snack. Also, they often end up in lunch boxes of my children.


You need for about 24 biscuits:

4 cups all purpose flour + some for dusting
5 teaspoons baking powder
1/2 teaspoon baking soda
1 teaspoon salt

1 stick of butter, very cold + 3 tablespoons melted butter
2 cups buttermilk or Kefir
1 cup smoked sausage, cut into small pieces
1 cup shredded cheese (Cheddar, Mexican mix)


Steps:

Preheat the oven to 400F (205C). Line the large baking sheet with parchment paper.

In a big bowl mix flour with salt, baking powder and soda. Add cold butter cut into small pieces. Rub the butter into flour mixture using your fingertips. After few minutes when you get crumbly mixture, make a well in it and add cold Kefir, or buttermilk, cut smoked sausage and shredded cheese and mix everything with a big metal spoon until you can form a very rough ball.

Move the dough onto floured surface, and form it into rectangle shape by patting. Fold it over, just like letter, and then pat it to get rectangle shape, and do folding and patting five more times, that helps to get flaky biscuits. While you work with the dough use flour generously for dusting top and bottom.

When you finally shape the dough into rectangle 1 inch tick, cut it into round shapes using floured glass or 2-inch diameter cookie cutter. Push the cutter straight down the dough. Gather the scrap dough and cut it too.

Place the round shapes on the baking sheet, slightly apart, and bake for 15-18 minutes, until biscuits' tops become golden brown.

When they are out of the oven, brush the biscuits with melted butter. They are the best when fresh, but if they are one or two days old you can always toast them.


Friday, November 6, 2015

Savory Strudel with Kale and Feta Cheese


I am a huge fan of strudel, it doesn't matter if it is sweet or savory. Everything about strudel is very special to me, and when we talk about savory one, I prefer it stuffed with Feta cheese and spinach. That is the best combination, proven so many times.


However, if you have garden full of kale for almost half of year like I do (it is very productive and long-lasting vegetable), you have to find a way to use it, so I decided to try it in strudel. Although I think there is too much hype about it, I do recognize kale if healthy and nutritious. Favorite soup in my family is Tuscan Soup with Kale and we have it at least 2-3 times monthly.


This year I planted two different kinds of kale: regular and purple one. Although they look different, the taste is pretty much the same. This vegetable is best when it's young (like on the pictures here) because baby kale is tender and not bitter.


The recipe below is for four rolls of strudel and that's a lot, but you can always freeze it, as my mom used to do it, or cut the amount of ingredients in half. This strudel is a good choice for breakfast or snack.


Savory Strudel with Kale and Feta Cheese


You need for the dough:

4 1/2 cups bread flour

1 cup warm milk

1 cup warm water

1/2 oz active yeast

2 teaspoons salt
1 teaspoon sugar
9 tablespoons melted butter
2 eggs


For filling:

1lb Feta cheese, crumbled
2 bunches of kale, stems removed and chopped
5 eggs
1 cup of Greek yogurt or Kefir
Salt and black pepper
1/2 stick of butter, melted

Baking pan, dimensions 13x9x2 inches, oiled


Steps:

Stir together flour, salt, sugar, yeast, melted butter and beaten eggs in a mixing bowl. Pour warm milk and water into the flour mixture. Mix everything with the spoon or in a food processor.


Transfer the dough to the counter and knead for about 10 min. Add more flour if needed.

Form dough in the round shape and put it in the lightly oiled large bowl to rise for 1 hour, to double its original size. Cover the bowl with plastic wrap.

In a bowl combine beaten eggs, crumbled Feta cheese, Greek yogurt, chopped kale and salt and black pepper to taste. You will use this as stuffing. 

Preheat the oven to 400F (205C).


Remove the dough from the bowl and divide it into four even pieces. Roll out each piece of dough with a rolling pin into rectangular shape that fits your baking pan. First brush the dough with melted butter, add 1/4 of stuffing over it, and fold the dough carefully into long roll. Place it in baking pan. Do the same with the rest of materials.

When you have all rolls placed in baking pan, brush their tops with melted butter. Let them rest for 15 minutes.

Bake strudel about 30 minutes, or until it gets nice golden-brown crust.

Serve with Kefir.


Thursday, September 3, 2015

Cheese - Roasted Red Pepper Spread (Urnebes Salad), and Summer in Serbia


This summer we had a very busy trip to Serbia. It was all about meting our friends and relatives and eating a lot of food. Although it sounds like a rather pleasant thing to do, it took a lot of planning, I have to say, we had a full schedule.


But, there were also days when we really wanted to skip the routine, we wanted to be alone, my husband and I, and do something for ourselves. One day we decided to borrow bikes from our friends and escape for a long ride to a forest on the other bank of the great river, Sava.


The Sava river offshoot


Sava is my favorite river. Although I grew up nearby, I discovered its beauty only in my teenage years. It is quite big, although this summer, after great heat and drought, it shrunk significantly.


As we rode by the river bank, we could see dry cracked soil, scattered river shells, and a lot of leaping frogs. No giant mosquitoes this time.


Before moving to U.S, riding bikes by the Sava river was one of our favorite activities. Surrounded by beautiful landscape, we had used to feel relaxed and energized at the same time. Now we wanted to recreate that feeling.


Given that just few days before this trip we had a long bike ride in Tuscany, from Florence to Siena, it was kind of interesting to compare landscapes of Italy and Serbia. While the heat was brutal in both countries, I definitely preferred flat Serbian road over hilly Tuscan one!


On our way, we noticed such a common scene for this part of Serbia, a stork and its huge nest on the village church belfry. That was so lovely. Hard to believe but I have never seen a stork in the U.S.


After an hour or so, we were at our destination, the forest called Bojčinska šuma.


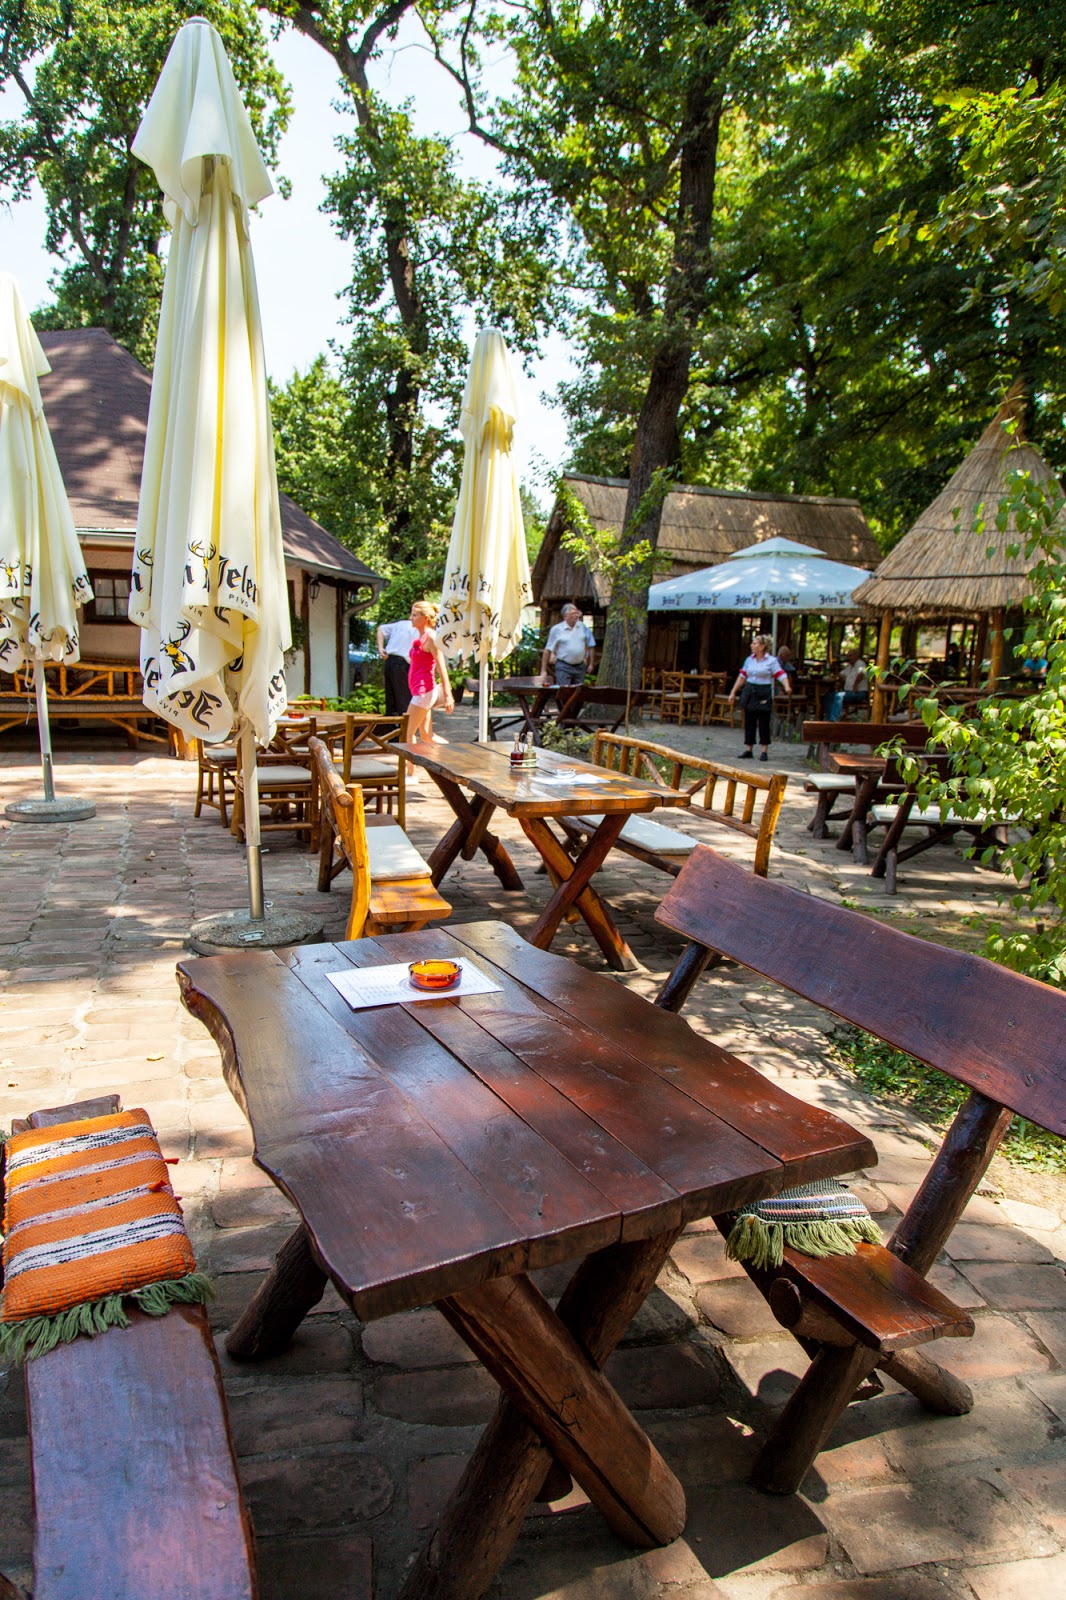
Yep, we planed to go to this restaurant located in the woods, in a deep shade. Its name is Bojčinka koleba.


The restaurant had a very traditional decoration, and the food was traditional too.


Serbia is a country of good bread, and it is eaten in great quantity, that is so true.


When you come to Serbia you eat food that you cannot try anywhere else, for example fish soup from a picture above. And let me ask you, where can you eat delicious fish soup that costs less than $1? Only in Serbia.


Few more typical Serbian dishes that every expatriate craves:


Šopska salad, eaten as a side with any kind of dish in the summer time.


Ćevapčići, grilled sausage links made of ground meat, one of the best and most popular dishes you can eat in Serbia.


Sarmice od zelja, some kind of greens, zelje, unknown in the U. S, stuffed with ground meat. It is always served with yogurt.  


Look at that roasted hot pepper with garlic dressing! Such a beauty! Find recipe here.


Beside eating good food, you can ride a horse here, or have a stroll in the woods...


And, you can visit a pig farm. 


This kind of pig called Mangulica is a special one, indigenous to this region. It is black and rather lean, and great sausages are made of it!


Soon, it was time to start our ride back. The trip ended soon, but the good memories are still alive.


Urnebes Salad


With so many things to do while in Serbia, we didn't have a chance to try everything we wanted to eat, so when I came back home to U.S., I was just making that food in my kitchen. One was a beautiful dessert, Krempita, puff pastry with vanilla custard, when I perfect the recipe I will share it with you.


The second dish was this Urnebes salad. It is very hard to translate its name, to be honest I don't even know the origin, or why it is named salad when obviously it is not. Urnebes is more like a spread or a dip. It is traditional Serbian dish that is served with Pljeskavica (Serbian burger), and Ćevapčići. Urnebes is spicy as the rest of food that comes from south of Serbia (like U.S., the food gets spicier as you go south).

You can use it with cooked smoked sausages and bacon, as I did, or as a dip for different raw vegetables.


You need:

1 large red bell pepper
200g Serbian white cheese, or Feta cheese
1 garlic, minced
1 teaspoon ground dried sweet pepper, Paprika
1/4 - 1/2 teaspoon chili or cayenne pepper, or crushed red pepper
3 tablespoons sour cream
Salt and back pepper to taste


Steps:

Roast  the whole red pepper in the oven. When it is charred and soft remove it from the heat and cool it down. Peel the dark skin, remove seeds and top, and chop finely.


In a bowl crumble the cheese with fork. Add paprika, chili, garlic, chopped red pepper and sour cream and mix it together until you get consistent mixture, or just mix it with a hand blender as I like to do.


Top it with paprika dust when serve.


Wednesday, April 1, 2015

Naturally Dyed and Decorated Easter Eggs (Using Onion Peel and Turmeric)


At some point of my life I decided to make only all-natural Easter eggs. Although I like to see variety of egg colors in an Easter basket, I don't feel comfortable using artificial dye, even if it says it's food-grade. That's especially the case if the dye penetrates below egg shell, for example seeing blue strains on my egg white is not really appetizing for me.


Dying with onion peel is a traditional and still very popular way of decorating Easter eggs in my homeland, Serbia. You wouldn't believe how many eggs are decorated over there, I am talking about several dozens per single family. Egg hunt is not so popular; instead we exchange Easter eggs with neighbors, friends and relatives. We also have egg-cracking competition, tournament style: each family member chooses an egg and then gently (or less gently) bumps against someone else's egg, trying to crack it, while keeping their own whole. Ultimately, whomever is left with unbroken egg is a winner.


On the pictures you can see how Easter eggs look like when dyed with onion skin (brown eggs) or turmeric (yellow ones). Very natural, indeed. Below, I will show you how to do it, plus, I will teach you how to make beautiful decoration with leaf imprints.


White or brown eggs?

If you use onion skin for dying you can use both, brown eggs will get deep brown color, white ones will be more light brown and reddish. However, if you use turmeric try white eggs.


How to get dry onion skin?

Last few years I have been collecting dry onion skin weeks ahead of Easter. But, you can always buy a lot of onions and peel off their skin. Also, many times I was allowed to peel onions placed on display in grocery stores.

I typically use brown and yellow onion, but you can try red onion skin too.


Onion peel dying 


You need:

12 eggs, white or brown

5 cups packed dry onion skin

4 or more cups of water to cover eggs in a pot

2 tablespoons vinegar

2 teaspoons salt

Vegetable oil for shiny look


Steps:

In a  medium pot, place half of onion peel on the bottom, than 12 eggs on them, and the rest of onion peel place over the eggs. Pour in water to be 1-2 inch above eggs and peel, then add vinegar and salt. Heat the water until it starts to boil, then reduce the heat. Simmer the eggs for about 20 minutes on low temperature. Check if the eggs are turning brown. When done, remove the saucepan from the cooker, wait for the eggs to cool down.

Give the eggs final touch by gently rubbing vegetable oil on them. Use cotton towel. They will be smooth and shiny, just perfect.


Turmeric egg dying

You need:

12 white eggs

6 tablespoons turmeric powder

Water to cover eggs

2 tablespoons vinegar

2 teaspoons salt


Steps:

Follow instructions for onion peel coloring above. Instead of using onion peel add turmeric powder.

When done, place eggs on paper towel to dry.


Leaf imprint decoration

Eggs decorated with arugula, parsley, sage, geranium leaves and geranium flower

You need:

Bunch of leaves of early spring plants that you can find nearby. Tender leaves are better choice. My favorites are Italian parsley and Chervil (French parsley).

A pair of old panty hose, cut into 4-5 inches wide stripes

Strings


Steps:

Before you use leaves leave them in a dish filled with water, it will be easier for you to apply them on the eggs.

After you lay leaf on the egg, cover it with hose stripe, then pull the hose very tightly on the opposite side of the egg, make a twist and secure it with string. Cut the part that hangs. Place the eggs into the saucepan with onion peel and follow cooking instructions from above.

When the eggs are done and cooled down, remove hose and leaves using scissors and let them dry. Then apply vegetable oil.


Sunday, August 10, 2014

How to Grill and Serve Eggplant


This is a great summer dish.When you grill meat, always remember to trow in some veggies too. Eggplant is a great choice. Let me show you how to prepare eggplant for grilling and how to serve it. Below are two different recipes, both of them produce great look and taste.


Grilled Eggplant with Red Onion, Mint and Walnut


You need for 6-8 people:

3 medium eggplants, sliced length-wise with slicer or mandoline
1/3 cup olive oil
Salt and black pepper
Juice of 1/2 lemon
1 large red onion, sliced
2 tablespoons fresh mint, chopped
3 tablespoons walnut, coarsely chopped


Steps:

Place eggplant slices on sheets of paper towel, salt them on both sides and cover with another layer of paper towel. Put large baking sheet over it, and add something heavy on top of everything to apply pressure on eggplant slices. Let it stay that way for 30 minutes. Salt and pressure will squeeze out liquid and thus take out bitterness from eggplant. Now wash eggplant with water, rinse and dry it with paper towel.

In the meantime, heat the grill.

Brush eggplant with olive oil and sprinkle with salt and black pepper. Grill eggplant slices for few minutes on both sides. They should get nice grill marks. Then place them on large dish as on the picture above.

Make the dressing with the rest of olive oil, lemon juice, salt and black pepper. Place onion rings over eggplant and drizzle the dressing over it. Sprinkle walnut and fresh mint. Serve it warm.


Grilled Eggplant Slices with Garlic Dressing


To make second version of grilled eggplant, slice it cross-wise. Repeat the same preparation and grilling method as in the first recipe.

For dressing use 1/4 cup olive oil, juice of 1/2 lemon, minced 1 clove of garlic, chopped 3 leaves of fresh basil, 1 tablespoon of fresh chives, salt and black pepper to taste. When the eggplant slices are grilled, drizzle them with the garlic dressing.


Bellow is an eggplant with very peculiar shape. Sometimes you find them that way.


Thursday, July 3, 2014

Easy Rolls with Feta Cheese (Brze kiflice sa sirom)


These are the best and the easiest rolls that I've ever made in my life. I found this recipe on Suzana's blog, here.


I have to make them again, as soon as possible. There is something very cool about the dough in this recipe - you don't have to wait for it to rise. That was great, because my kids didn't want to wait, they wanted to eat the rolls right away. Plus, they were my helpers, which means mess was all around... I had to work fast. My kids just love to play with dough. If you needed an idea how to entertain your kids during summer break, now you have it.


You don't need more than 20-25 minutes to make these rolls, plus baking time. Bread flour and instant yeast can be replaced with regular, all-purpose flour and active yeast, but I do not guarantee that the dough will be as airy. Also, you can replace sesame and caraway seeds with something else, but believe me, those are the best for topping.

If you keep the rolls wrapped with plastic foil they will be fresh a day after, if any left:)


You need for dough:

600g (4 1/2 cup) bread flour + some for dusting
1 teaspoon salt
2 teaspoons instant dry yeast
1 teaspoon baking powder
200ml (4/5 cup) warm milk
100ml (1/2 cup) vegetable oil
1 cup sour cream

For filling:
1 egg, beaten
100g Feta cheese, crumbled

For glaze:
1 egg yolk
1 teaspoon milk

Sesame seeds
Caraway seeds


Steps:

Use food processor or mixer to make the dough. Pulse flour, salt, baking powder and instant yeast in food processor for few seconds. Add warm milk, oil and sour cream. Mix it until you get smooth and palatable dough.

Remove the dough to flour-dusted surface. Knead it few times, and shape it into a ball. With a dough cutter divide it into four even pieces and shape them into balls.

Roll out each ball with rolling pin until you get circle 12" in diameter. Using sharp knife cut the circle into 8 even triangle pieces, first making +, then x with the knife.

Mix crumbled Feta cheese with beaten egg. Place about 1 teaspoon of filling on wider half of each small triangle. Roll triangles starting from the wider side. If you want the rolls to look nicer and ensure filling doesn't spill over during baking, fold the sides of triangles and then roll them. Place the rolls on baking sheet lined with parchment paper. Do the same with the rest of the dough balls. You will need two large baking sheets. Let the rolls rest for 15 minutes before baking.

Meanwhile preheat the oven to 355F (180C).

Brush the rolls with mixture of beaten egg and milk, and add sesame or caraway seeds on the top.

Bake them for 18-19 minutes until crust becomes golden.


Serve the rolls warm.


Tuesday, April 1, 2014

Spiral Rolls with Phyllo Dough


Gibanica, one of the most popular dishes in Serbia, is a Cheese Pie made with phyllo dough. After using same old recipe (and getting great results) for years, I finally decided to experiment and make this traditional pie a bit differently. Instead of laying flat layers of phyllo dough, this time I rolled it into spirals. Original recipe find here.

The pie turned out beautifully, in my opinion even better than the original recipe. Phyllo dough was so crispy and flaky on the top, and I loved soft layers of cheese and dough in the middle. And it was nice for serving too.

I also made two filling variations: one with spinach and the other plain egg-cheese, because my kids do not like spinach. Do what you like, but I prefer cheese-spinach combo, especially in the Spring time. If you like it too, check out another recipe where I use this combination.


You need:

12 sheets of phyllo dough, I prefer thicker for savory stuff, left 2 hours on room temperature
1/2 cup Canola oil
5 eggs
1lb Feta cheese, crumbled
1 cup Kefir or Greek yogurt
1 package of frozen spinach (optional), thawed and drained
1/2 teaspoon salt
1/4 teaspoon black pepper
3/4 stick of butter

You need one large or two smaller baking pans


Steps:

Preheat oven to 400F (205C). Grease the pan with oil.

In a bowl mix beaten eggs, Kefir, crumbled Feta cheese, spinach, salt and pepper.

Open phyllo dough package, unfold sheets and cover them with damp kitchen towel.

Take one phyllo sheet and spread oil over it using pastry brush. Next, add cheese-spinach filling liberally, keeping in mind you need filling for the rest of sheets. Then, start to fold sheet diagonally to get the longest possible roll. Once folded, roll it into spiral shape very carefully and place it on the baking pan. Repeat the same with the rest of phyllo dough.

When you are done with rolling, cut butter into small cubes and place them on the top of spiral rolls. Put the pan into the oven, on the middle rack, and bake rolls for 30 minutes, until they become golden brown. Serve warm.


Related Posts Plugin for WordPress, Blogger...